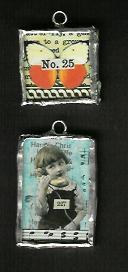
Showing posts with label Charms. Show all posts

Saturday, October 06, 2007

Lets get Gothic!

Michelle is celebrating the 1st Anniversary of her GPP Street Team Crusades with the launch of the 13th crusade being..........Gothic........what else could it possibly be?
I'm currently hosting a Gothic arch swap in one of my groups having always loved the idea after first seeing this on Belinda's blog, then on art-e-zine here. Just to be a little different I designed a taller, slender arch page and the swap would include charms as well, all on a Gothic theme of course.
There are some fabulous pages being produced for this swap & I love seeing how each individual artist interprets the theme, you can check some of them out here........ Marion's (scroll down) , Angela's (scroll down), Keron's, Jane's, Cynthia's, Rebecca's & Wendy's. I'll add more links as they become available.
If you would like to have a go at making this taller style gothic page here's the template and instructions:
Gothic Arch page construction:
The basic Gothic arch begins simply enough with a straight, horizontal line.

You will need:
Firm cardstock
Ruler,
Sharp pencil
Compass.

1.Mark out a rectangle 3.5 x 7.5 inches on a firm piece of cardstock, measure 4.5 inches up from the bottom of your rectangle (portrait orientation) & draw a line across…. This is the baseline A-B
2.Extend your compass out to the exact same length of your baseline (3.5 inches).

3.With your compass needle at point B, construct arc A-C.
4.With your compass needle at point A, construct arc B-C.
Voila…you now have your Gothic Arch page ready to cut out & use.

Monday, April 16, 2007

I found it in my garden......

Keron - the "Colourguru" is hosting a deco swap with a difference for the Paper Traders group on Yahoo. We are to make 2 covers - 3.5" x 5.5", 6 pages - 3" x 5" & 6 charms, all of which will be swapped out. Here are my charms & pages.......

The Charms
(Click picture for a larger image)

Nest
Tinted gesso & cheesecloth, gel medium transfer & collage

Rusty tools
Fluid acrylic background, stamping & collage, edges embossed with vintage photo distress powder which looks & feels like rust.

Butterflies
Tinted & white gesso, cheesecloth & collage. Deeper blue added with Neocolour watercoluble crayons.

Beehive
Fluid acrylic & stamped backgound, gel medium transfer & collage. Covered with a gold metallic glaze which doesn't show up on the scan & bees painted with h2o's.

Birds singing
Tinted gesso, stamping & collage

Fossils
Layers built up with tissue, coloured glazes & collage images to add depth with the addition of mica chips.

Saturday, February 10, 2007

A few more Charms......

....that I've been having fun making. These are soldered seaglass picked up off my local beach whilst walking my dear old Max & embellished with sterling silver wire spirals.
This will be the last of the creative stuff posted for a week or so as my Mum will be arriving from France tomorrow to stay.
I will be quickly posting the draw result on Valentine's Day, so don't forget to add your name if you wish to be included - see previous post here.

Sunday, January 07, 2007

Charms

I've finally managed to complete my charms for the Oh So Charming charm swap. If you fancy having a go at these, I've included the instructions. Warning......soldering is addictive!

Ingredients
Glass marbles
Rubbing Alcohol
6 mm wide copper tape
Scissors
Bone folder
Flux
Lead free solder
Soldering iron
Silver jump rings
Silver Indian bell charms

Directions
Clean the marbles well with the rubbing alcohol.

Measure some copper tape by wrapping around a marble to gauge the circumference allowing a little extra for overlap (approx. 5.5cm) and cut as many pieces as required.
Then cut each 5.5cm strip down to narrower pieces making them 2mm wide.

Wrap 2 pieces of copper tape around marble in opposite directions forming segments & burnish well with a bone folder.

Flux & solder over the copper tape.

Flux & solder jump rings to top & bottom, then wash charms in warm soapy water. Once dry, polish with silver cloth.

Attach bell charms.


Saturday, December 30, 2006

Soldering


Santa was really sweet this year, not only was I lucky enough to receive Sally Jean's new book Pretty Little Things but also a soldering iron & supplies to get me started........guess I must have been a good girl! LOL
Here are my first attempts, a little rough around the edges but as they say, practice practice practice!